Add a new client
This guide describes how to register additional OAuth clients in NQRust-Identity, beyond the Portal client created in Phase 2. The example uses NQRust Analytics; substitute the names with values appropriate for your application.
Prerequisites
- Phase 1 and Phase 2 are complete.
- The Identity Admin Console is accessible and the
nqrustrealm exists. - The target application is ready to be configured with a Client ID and Client Secret.
Step 1 — Open the Identity Admin Console
Open the Identity Admin Console in a browser and sign in:
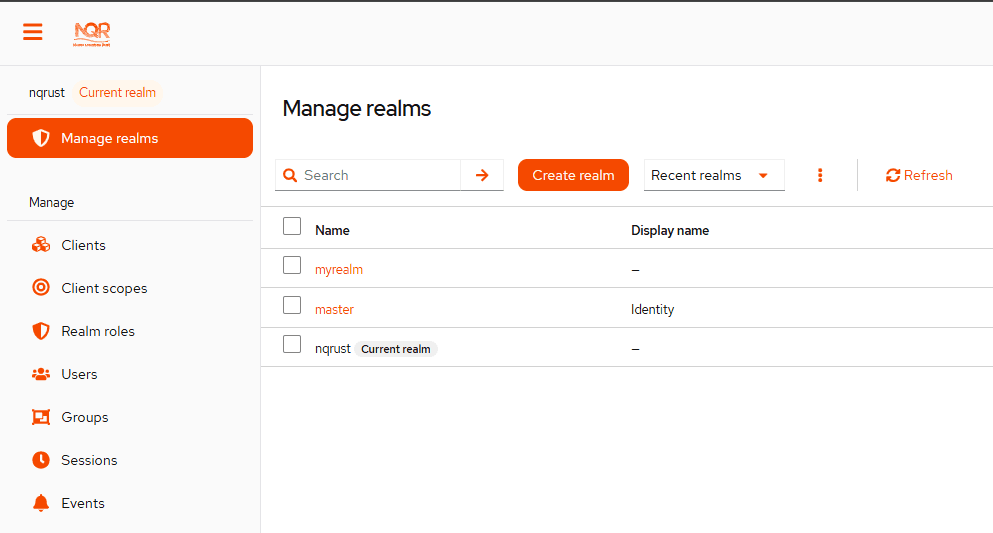
https://<hostname>:<identity_port>/adminEnsure nqrust is the Current realm (the realm name is displayed at the top of the left sidebar). If a different realm is shown, click Manage realms then select nqrust.
Step 2 — Create the OAuth client
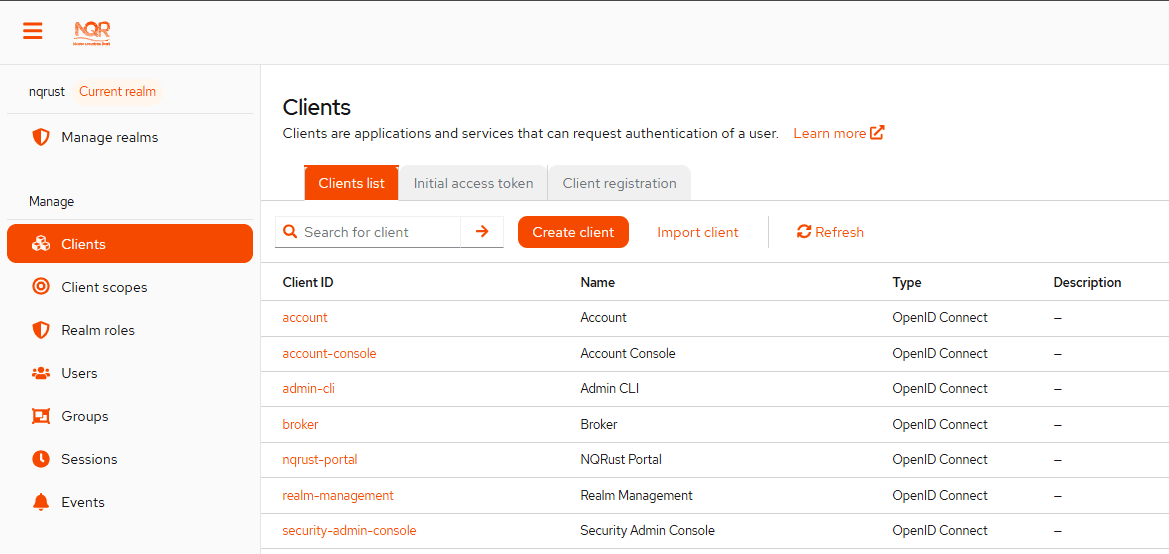
The wizard has three steps: General settings, Capability config, and Login settings.
To open the wizard:
- In the left sidebar, click Clients.
- Click Create client.
Step 2.1 — General settings
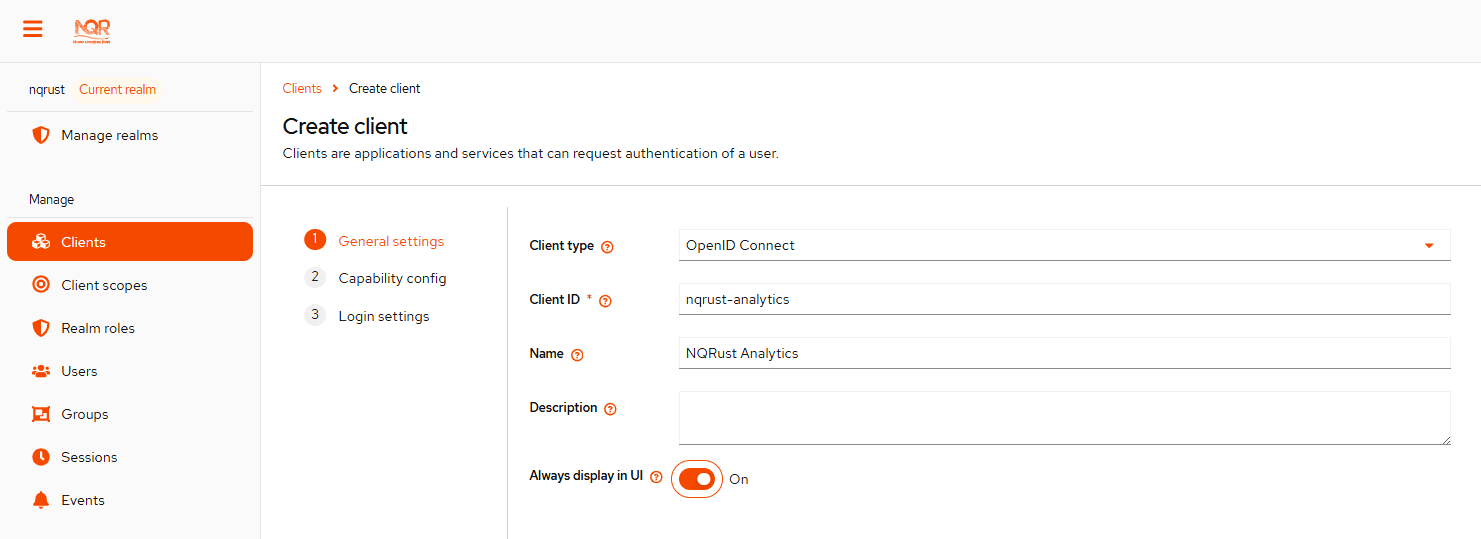
Fill in the General settings form:
| Field | Value |
|---|---|
| Client type | Leave as OpenID Connect. |
| Client ID | Enter nqrust-analytics. This value is required. |
| Name | Enter a display label, for example NQRust Analytics. |
| Description | Optional. Leave blank, or enter a short description such as OAuth client for NQRust Analytics. |
| Always display in UI | Toggle to On. |
Click Next to continue.
Step 2.2 — Capability config
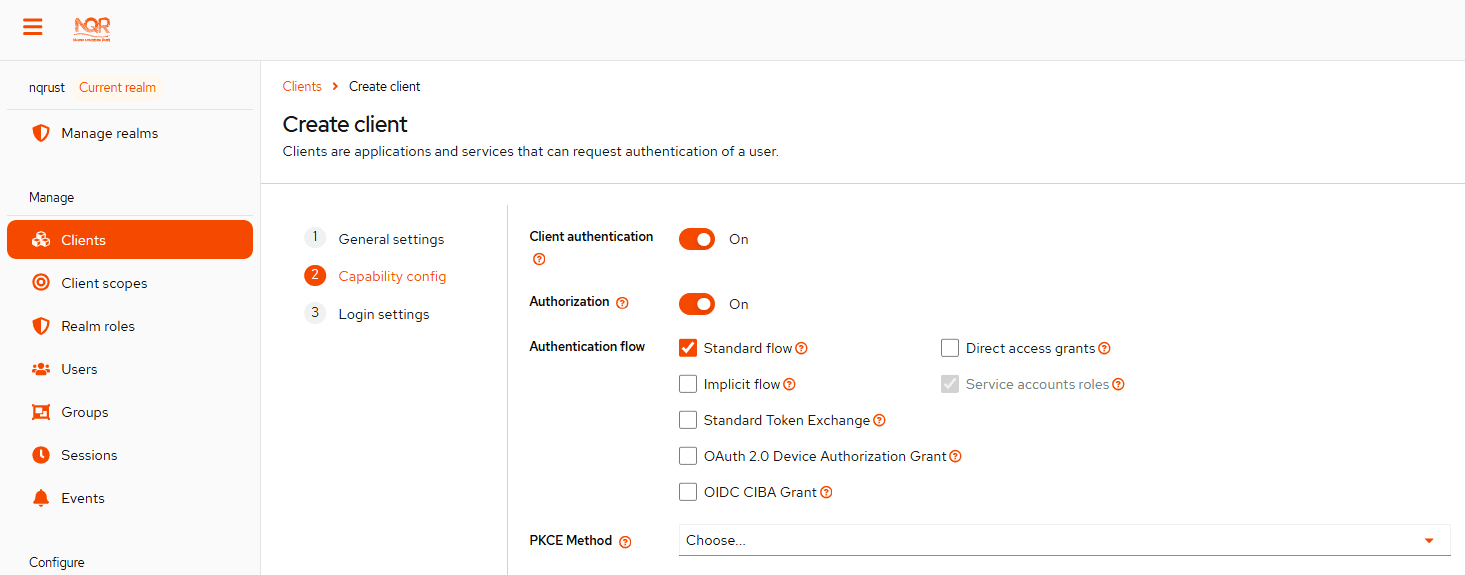
Configure the Capability config form:
- Client authentication — toggle to
On. - Authorization — toggle to
On. - Authentication flow — ensure the following are checked:
- Standard flow
- Service accounts roles
- PKCE Method — leave as
Choose...(no value).
Click Next to continue.
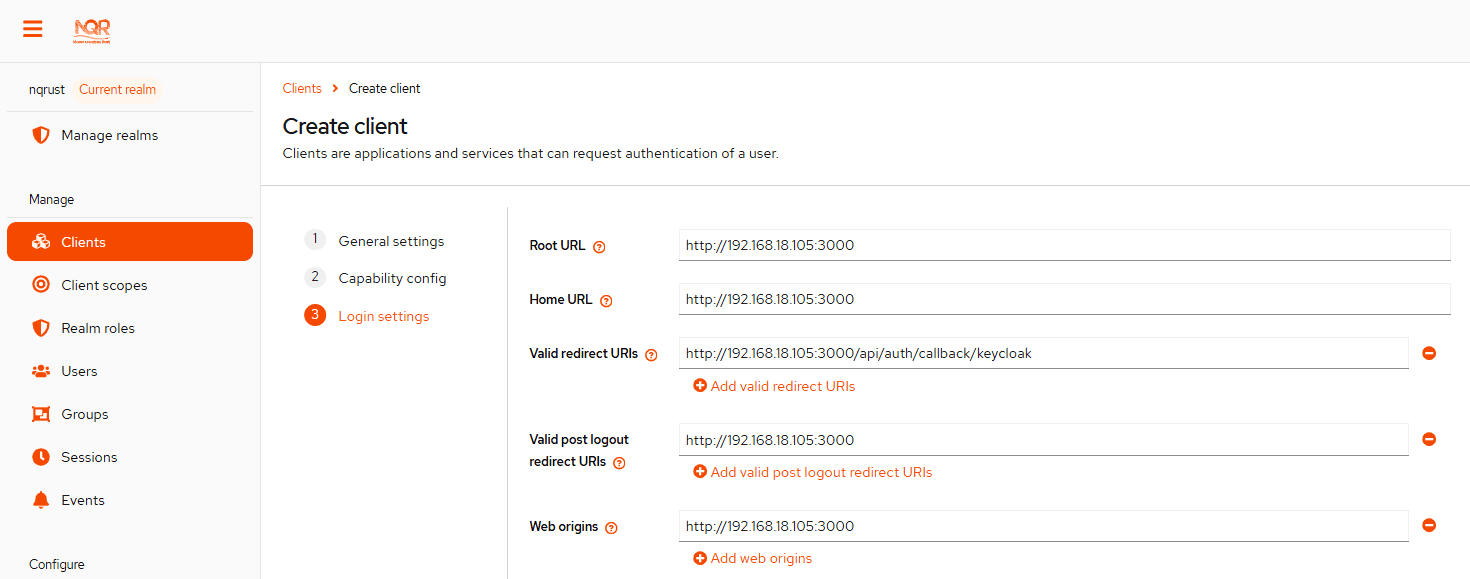
Step 2.3 — Login settings
Fill in the Login settings form with the URLs of the target application. Each application has its own host, port, and callback path; adjust the values accordingly.
| Field | Description |
|---|---|
| Root URL | The base URL of the application, for example https://analytics.example.com. |
| Home URL | Usually the same as the Root URL. |
| Valid redirect URIs | The OAuth callback URL of the application, for example https://analytics.example.com/auth/callback. |
| Valid post logout redirect URIs | The URL Identity redirects to after logout, for example https://analytics.example.com. |
| Web origins | The browser origins allowed to call Identity, for example https://analytics.example.com. |
Click Save.
Step 3 — Copy the client secret and configure the application
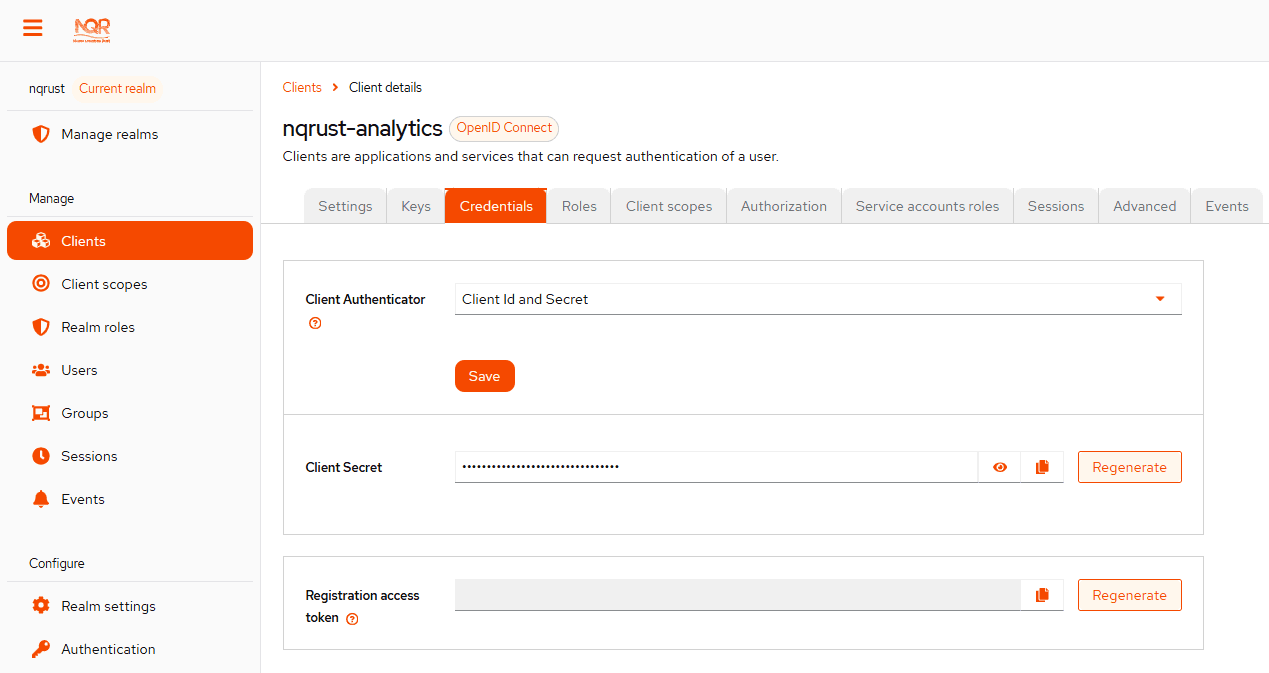
Click the Credentials tab on the nqrust-analytics Client details.
- Locate the Client secret field.
- Click the copy button to copy the Client Secret to the clipboard.
- Retain this value; it will be pasted into the application configuration in the next step.
Paste the Client ID and Client Secret into the application's configuration. The exact mechanism depends on the application's framework or language; refer to the application's documentation. A common pattern is to read the values from environment variables:
OIDC_CLIENT_ID=nqrust-analytics
OIDC_CLIENT_SECRET=<paste-secret-here>
OIDC_ISSUER=https://<hostname>:<identity_port>/realms/nqrustTreat the client secret as a password. Do not share it or commit it to version control.
Step 4 — Create a realm role for the client
Create a realm role to assign to users who require access to this client.
- In the left sidebar, click Realm roles.
- Click Create role.
- In the Role name field, enter
nqrust-analytics. - Optionally, enter a description such as
Grants access to NQRust Analytics. - Click Save.
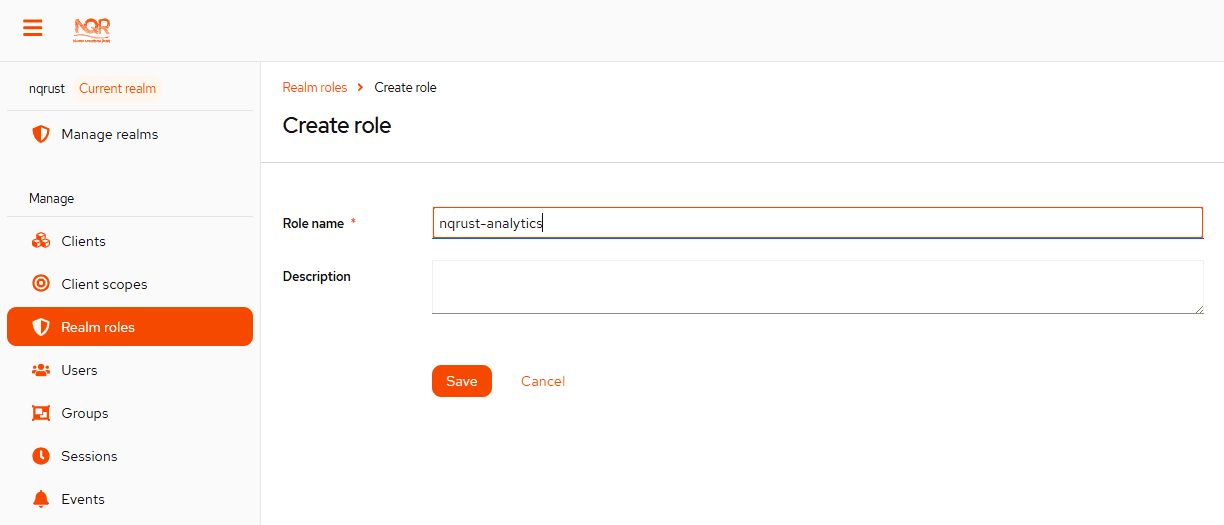
Naming the role to match the Client ID (nqrust-analytics) keeps the configuration consistent. Any name accepted by the application's authorization logic is valid.
Step 5 — Assign the role to users
Grant users the nqrust-analytics role so they can access the application.
- In the left sidebar, click Users.
- Click the username that requires access. If the user does not exist, click Add user to create one first (see Phase 2, Step 7 for the user creation steps).
- On the User details page, click the Role mapping tab.
- Click Assign role. In the dialog, select Realm roles.
- Check the
nqrust-analyticsrole. - Click Assign.
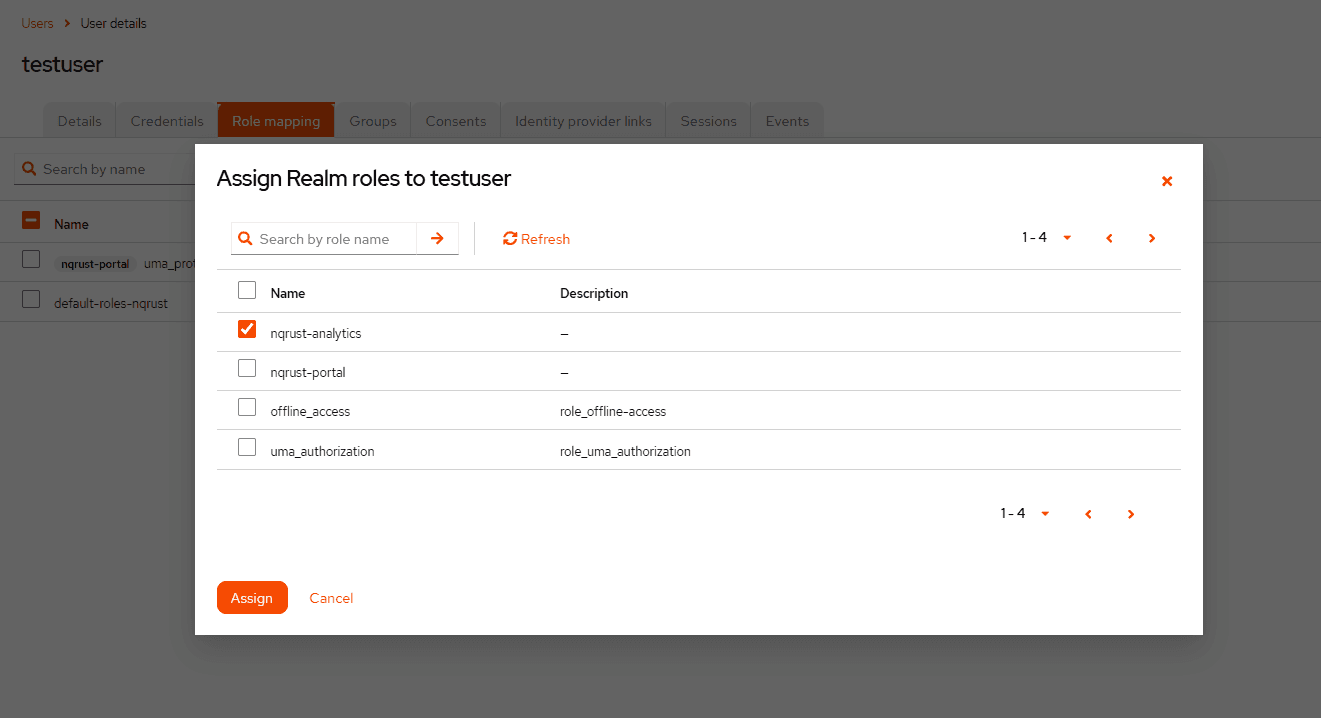
Repeat this step for every user that requires access to the new client.
The new client is now registered, configured, and ready to authenticate users.